


Top 10 Shower Hinge Tips for Easy Installation
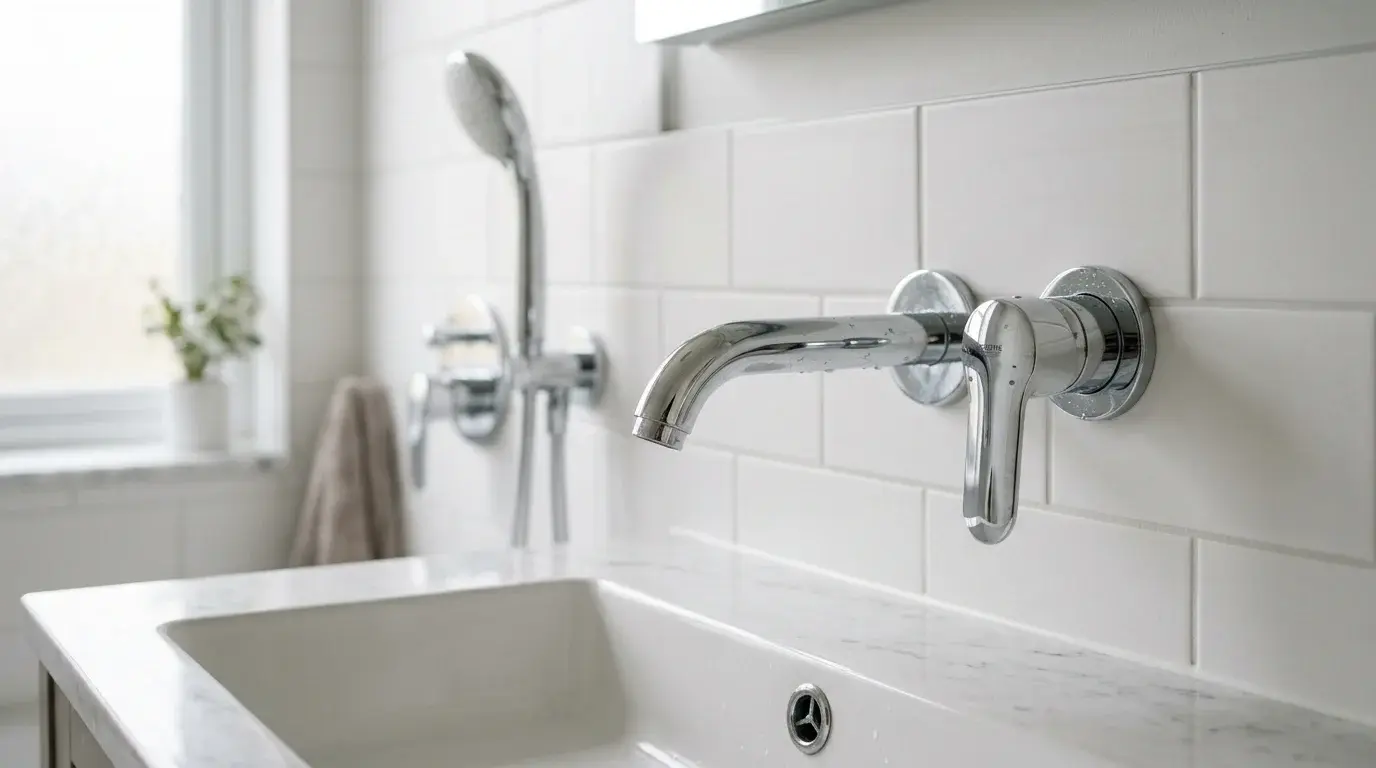
Proper installation of Shower Hinges, especiallyheavy duty shower door hinges, is crucial for ensuring functionality and safety. A well-installed stainless steel 316 shower hinge minimizes the risk of leaks and enhances the overall durability of the shower door. Following these tips leads to a smoother installation process with numerous benefits:
- Perfect Fit: Ensures no gaps that could lead to leaks and water damage.
- Durability and Longevity: Reduces wear and tear, lowering maintenance costs.
- Safety: Minimizes risks of accidents with secure fittings.
- Maximized Functionality: Optimizes door placement and access.
- Warranty Compliance: Protects investment by meeting manufacturer guidelines.
If you're looking for shower hinge wholesale options, consider reaching out to a reputable shower hinge manufacturer. Additionally, for those in need of custom solutions, OEM shower hardware can provide tailored options to meet specific requirements. Before starting, gather all necessary tools and materials for a successful installation.
Key Takeaways
- Gather all necessary tools before starting the installation to ensure a smooth process.
- Choose the right type of shower hinges based on door weight and design for optimal functionality.
- Measure accurately to avoid gaps and ensure a perfect fit for the shower door.
- Use the correct screws and follow torque specifications to secure hinges properly.
- Regularly check and adjust the alignment of hinges to maintain smooth operation.
- Avoid common mistakes like over-tightening screws and ignoring manufacturer instructions.
- Perform regular maintenance, including lubrication, to prevent squeaks and ensure longevity.
- Take your time during installation to avoid errors that could lead to costly repairs.
Preparation for Shower Hinge Installation

Gather Your Tools
Before starting the installation, gather all necessary tools. Having the right tools on hand simplifies the process and minimizes delays. Here is a list of essential tools recommended by professional installers:
| Tool | Description |
|---|---|
| Tube of Dow Clear Silicone | Preferred by Basco installation professionals |
| Caulk Gun | Essential for applying silicone |
| 1/8” Steel drill bit | Used for drilling holes in various materials |
| 3/16” Masonry drill bit | Suitable for masonry installations |
| Tape Measure (12’) | For accurate measurements during installation |
| Hack Saw with Blade | For cutting materials as needed |
| Level (2’) | Ensures the installation is straight and level |
Additionally, include a few more items such as wood shims and various screwdrivers. These tools will help ensure a smooth installation process.
Choose the Right Shower Hinges
Selecting the appropriate Shower Hinges is crucial for both functionality and aesthetics. Different types of hinges can affect installation difficulty and durability. For instance, hinged shower doors require significant clearance for swinging open, which can complicate installation in smaller spaces. Conversely, pivot shower doors utilize space more efficiently but demand precise installation to avoid misalignment.
When choosing hinges, consider the thickness of the shower glass. A minimum thickness of 3/8" provides stability. Also, evaluate the finish and style of the hardware to match the overall design of the bathroom. Proper selection of Shower Hinges ensures a secure fit and enhances the longevity of the installation.
Measure Twice, Cut Once
Accurate measurements are vital for a successful installation. Follow these steps to ensure precision:
- Measure the opening’s height from the shower base or tub edge to the top of the tile wall or wall unit. Ensure measurements are accurate to the nearest 1/16-inch.
- Check that walls are plumb, meaning they are perfectly vertical to avoid gaps and leaks.
- Decide on the thickness of the shower glass, with 3/8" being the minimum for stability.
- Choose appropriate hardware for the shower enclosure, considering various finishes and styles.
Inaccurate measurements can lead to ill-fitting glass panels, potential damage, and increased expenses due to the need for replacement parts. Taking the time to measure correctly will save time and money in the long run.
Understanding Your Shower Door and Hinges
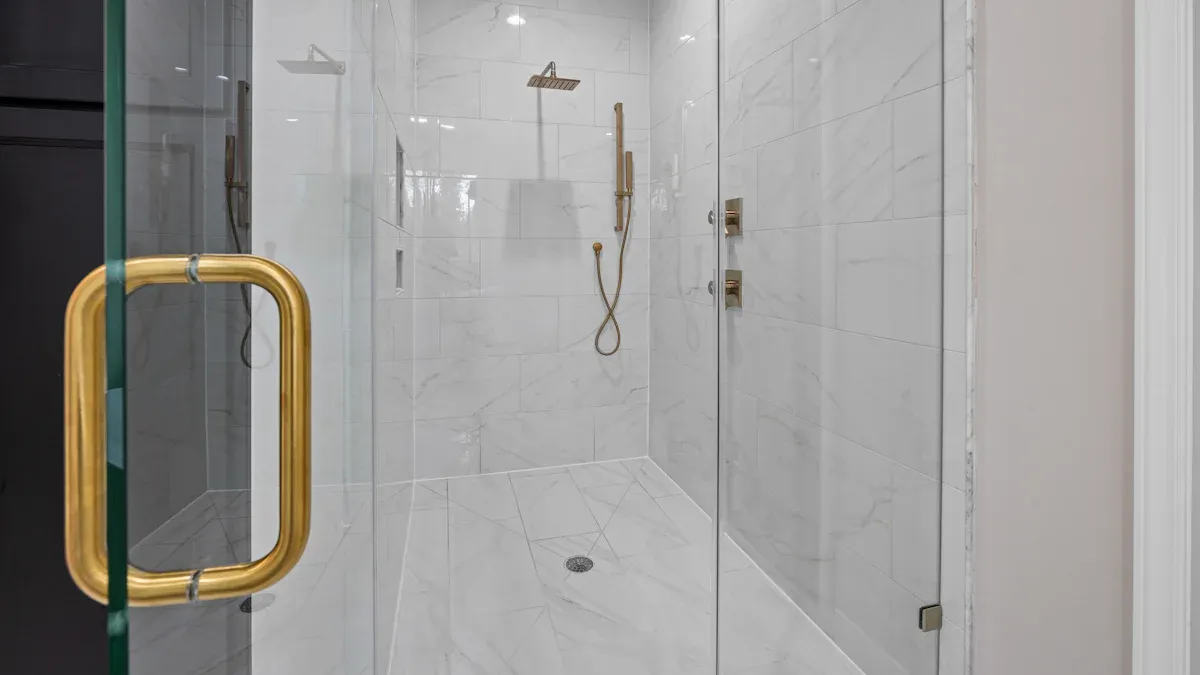
Types of Shower Hinges
Choosing the right type of shower hinge is essential for both functionality and aesthetics. Various types of hinges cater to different shower door designs. Here are some popular options:
- Wall Mount Frameless Glass Shower Door Hinges: These attach a swinging glass panel to a wall and come in various finishes.
- Glass-To-Glass Hinges for Frameless Shower Doors: These connect glass panels at angles, making them suitable for designs with multiple glass elements.
- Pivot Hinges on Frameless Glass Shower Enclosures: These allow doors to pivot from upper and lower points, offering a modern aesthetic.
Additionally, specific hinges cater to unique configurations:
- 90° Shower Hinges: Commonly used where two glass panels meet at a right angle.
- 135° Shower Hinges: Designed for layouts where panels meet at obtuse angles, often found in custom showers.
- 180° Shower Hinges: These allow panels to align in a straight line, ideal for walk-in showers.
Weight Considerations for Shower Doors
The weight of a shower door significantly influences the choice of Shower Hinges. Properly matching the hinge's weight capacity to the door's weight is crucial for ensuring longevity and safety. Here are some key points to consider:
- Heavy doors necessitate the use of heavy-weight hinges, designed for high-frequency use and larger glass panels.
- Lighter doors can utilize standard-weight hinges, which are available in various types.
- It is advisable to select Shower Hinges with aweight capacity that exceeds the actual door weight by at least 25%. This creates a safety margin and prevents premature wear.
Door Size and Placement
Correct door size and placement are vital for optimal functionality. When determining the size of the shower door, consider the following:
- Measure the height and width of the shower opening accurately.
- Ensure that the door swings freely without obstruction.
- Account for any additional features, such as Towel Bars or shelves, that may affect placement.
Proper placement also involves ensuring that the hinges are installed at the correct height. This helps maintain balance and allows for smooth operation.
Shower Hinge Installation Steps
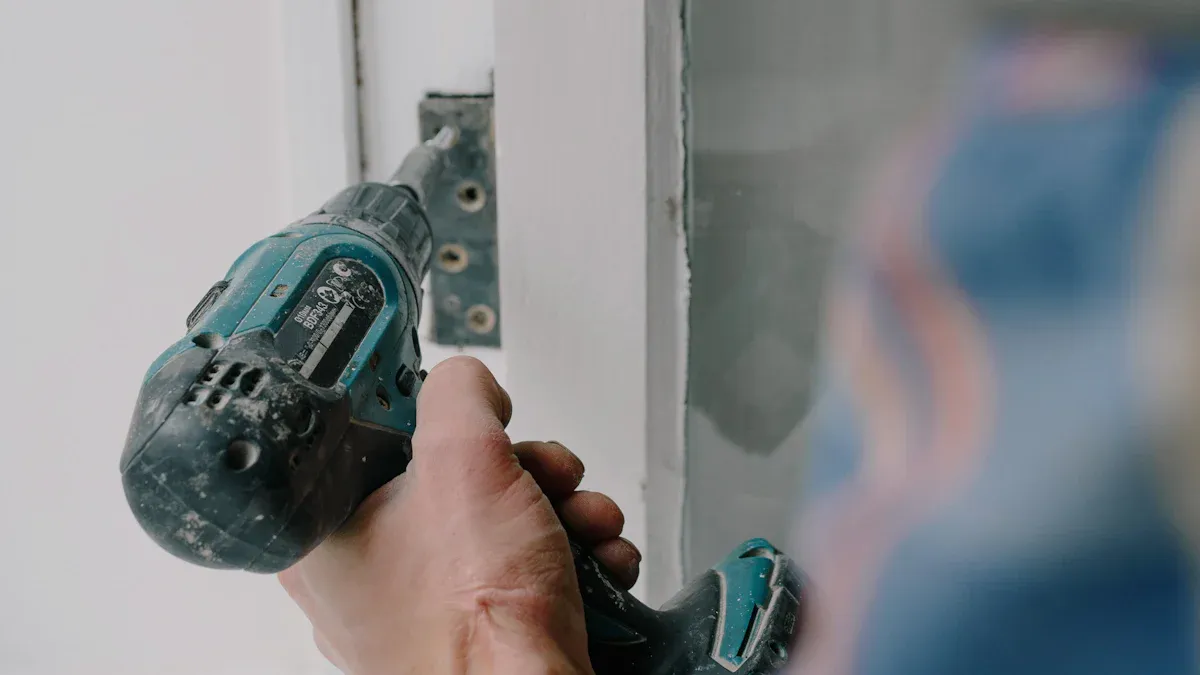
Marking the Drill Points
Marking the drill points accurately is essential for a successful shower hinge installation. Begin by following these steps:
- Verify Glass Cutouts: Measure the hinge backplate and compare it to the cutout on the glass. Ensure they match perfectly.
- Check for Plumb and Level: Use a spirit level to confirm that the wall where the hinges will mount is plumb.
- Clean the Surface: Ensure the glass surface around the cutouts is clean and dry to promote a secure fit.
- Position the Hinge: Slot the main body of the hinge into the glass cutout, ensuring it aligns correctly.
- Mark the Drill Holes: With the hinge in place, mark the center of the screw holes on the wall.
Accurate marking prevents misalignment and ensures that the shower door operates smoothly.
Drilling Holes for Shower Hinges
Once the drill points are marked, proceed to drill the holes. Follow these steps for effective drilling:
- Gather Necessary Materials: Ensure you have the right drill bits and tools ready.
- Drill Pilot Holes: Use a drill to create pilot holes at the marked locations. This step helps prevent cracking the tile or glass.
- Check Alignment: After drilling, double-check the alignment of the holes with the hinge to ensure proper fit.
Drilling accurately is crucial for the stability of the shower door. Misaligned holes can lead to complications during installation.
Attaching the Shower Hinges
Attaching the shower hinges securely is vital for the door's functionality. Follow these steps to ensure a proper installation:
- Prepare the Hinges: Disassemble the hinge if necessary, and apply rubber or plastic gaskets on the inside of the hinge body and backplate.
- Position the Glass Door: Carefully lift the glass door into the shower opening, ideally with assistance to manage the weight.
- Use Wooden Spacers: Maintain proper alignment and spacing around the door using wooden spacers.
- Secure the Backplate: Align the backplate on the opposite side of the glass and insert clamping screws.
- Final Tightening: Tighten the screws evenly using a hex key. Ensure the door swings smoothly and check for uniform gaps between the door and fixed panel.
Following these steps will help achieve a secure and functional installation of the shower hinges. Proper attachment enhances the longevity and performance of the shower door.
Ensuring a Secure Fit for Shower Hinges
Using the Right Screws
Selecting the correct screws is vital for securing shower hinges effectively. The right screws ensure that the hinges remain stable and functional over time. Here are key steps to follow:
- Attach the Wall Bracket: Ensure the bracket aligns precisely with the hinges.
- Connect the Hinges: Insert the hinge pin into the wall bracket and tighten it securely.
- Adjust the Hinges: Use an Allen wrench or screwdriver to adjust the tension for smooth operation.
- Seal the Hinges: Apply waterproof sealant around the hinges to prevent leaks.
Using stainless fasteners and neoprene gaskets enhances durability and prevents corrosion, especially in humid environments.
Checking Alignment of Shower Hinges
Proper alignment of shower hinges is crucial for functionality and aesthetics. Misalignment can lead to operational issues and premature wear. Follow these steps to check alignment effectively:
- Assess the Current Alignment: Examine the door for gaps and use a level to check vertical alignment.
- Locate the Adjustment Screws: Identify vertical, horizontal, and compression adjustment screws on the hinges.
- Make Vertical Adjustments: Adjust the vertical screws to correct sagging or height issues.
- Adjust Horizontal Positioning: Use horizontal screws to align the door with the frame.
- Fine-Tune the Compression: Adjust compression screws to ensure a tight seal.
- Test and Refine: Open and close the door to check operation and alignment.
Regularly checking the alignment helps maintain the door's functionality and prevents future issues.
Tightening Shower Hinges Properly
Tightening shower hinges correctly is essential for ensuring a secure fit. Follow these guidelines for optimal results:
- Adhere to manufacturer torque specifications.
- The recommended torque range for common hinges is 8–12 ft·lb.
- Use stainless fasteners and neoprene gaskets to enhance longevity.
Proper tightening prevents loosening over time, which can lead to door misalignment and operational difficulties.
By following these steps, installers can ensure a secure fit for shower hinges, enhancing both safety and functionality.
Common Mistakes to Avoid with Shower Hinges
Over-tightening Screws
Over-tightening screws is a frequent mistake that can lead to significant issues. When installers apply excessive force, they risk damaging the glass or the hinge itself. This can cause cracks in the glass or misalignment of the door. To avoid this, installers should adhere to the manufacturer's torque specifications. A recommended torque range for most hinges is between 8–12 ft·lb. Proper tightening ensures a secure fit without compromising the integrity of the materials.
Ignoring Manufacturer Instructions
Ignoring manufacturer instructions is another common pitfall. Each hinge type comes with specific guidelines that detail installation procedures, weight limits, and maintenance tips. Failing to follow these instructions can lead to improper installation, resulting in functional issues. For example, neglecting to use the correct screws or not following the recommended installation sequence can cause misalignment or even hinge failure. Installers should always read and understand the manufacturer's documentation before beginning the installation process.
Skipping the Level Check
Skipping the level check can lead to a host of problems. If the hinges are not installed level, the door may not swing properly, leading to increased wear and potential damage. Misalignment can create gaps that allow water to escape, resulting in leaks and water damage. To ensure proper alignment, installers should use a level during the installation process. This simple step can prevent future complications and ensure the door operates smoothly.
Here are some additional common mistakes to avoid during shower hinge installation:
- Misalignment: Leads to doors not swinging correctly and increased wear.
- Incorrect drilling: Using the wrong bit or poor alignment can cause functional issues.
- Neglecting clearance: Can result in binding due to thermal changes.
- Poor hinge security: Insufficient or inappropriate hinges can cause sagging.
| Mistake | Symptoms | Solutions |
|---|---|---|
| Misalignment | Doors not aligning properly; visible gaps | Recheck measurements and adjust hinge placements. Ensure even gaps. |
| Incorrect drilling | Drilling errors lead to poor hinge function | Use the correct drill bit size and maintain alignment while drilling. |
| Neglecting clearance requirements | Binding due to thermal expansion | Measure precisely and allow adequate clearance for smooth operation. |
| Poor hinge security | Doors sagging under weight | Use enough quality hinges, especially heavy-duty ones for stability. |
By avoiding these common mistakes, installers can ensure a successful shower hinge installation that enhances both functionality and longevity.
Troubleshooting Shower Hinge Issues
Door Not Closing Properly
A shower door that does not close properly can lead to water leaks and other issues. Installers should consider several factors when troubleshooting this problem:
- Check for Loose Screws: Inspect the screws on the hinges, handles, and latches. Tighten any loose screws with a screwdriver.
- Clean the Hinge Area: Accumulated dirt can hinder movement. Scrub the hinge area with vinegar to remove buildup.
- Realign the Door: If the door drags, it may need realignment. Adjusting the clamps often requires removing the door from the track, so consulting a professional may be best.
- Adjust Rollers or Wheels: If the door is out of level, adjust the rollers or wheels. Many sliding shower doors have adjustments that allow raising or lowering the panel.
- Level the Door Bar: Some sliding doors feature hex screws or cam nuts for leveling. Locate these adjustment points and turn them as needed.
- File a Groove: As a last resort, file a shallow groove in the top of the rail where the wheels rest. This creates a small bump to prevent the door from rolling open.
Squeaky Shower Hinges
Squeaky shower hinges can be annoying and indicate underlying issues. Common causes include:
- Lack of Lubrication: Over time, hinges can dry out, leading to friction and noise.
- Corrosion: Humidity can cause rust, affecting hinge movement.
- Loose Parts: Loose screws or bolts can lead to rattling and squeaking.
To resolve squeaky hinges, follow these steps:
- Inspect for Loose Screws: Tighten any loose screws to eliminate rattling.
- Identify the Source of the Squeak: Test the door to pinpoint where the noise originates.
- Clean the Hinges: Remove dirt and grime from the door frame and hinges.
- Remove Corrosion: Use a water-displacing spray to eliminate rust.
- Apply Lubricant: Generously apply a silicone-based lubricant to the hinges.
- Reapply Lubricant: Clean the hinges again and reapply lubricant as needed.
Regular maintenance can prevent squeaks. Inspect and clean hinges frequently, and apply lubricant every few weeks to maintain smooth operation.
Loose Hinges Over Time
Loose hinges can compromise the functionality and safety of a shower door. To prevent this issue, consider the following maintenance tips:
- Conduct regular inspections for signs of damage.
- Tighten any loose screws gently with a screwdriver.
- Apply thread-locking compound to screw threads to prevent loosening.
- Clean the hinges with mild detergent and a soft cloth after each use.
- Periodically check the screws for tightness and lubricate hinge pins with a silicone-based lubricant.
By addressing these common issues promptly, homeowners can ensure their shower doors function smoothly and maintain their longevity.
Following the tips for shower hinge installation is essential for achieving long-term durability and functionality. Proper material selection prevents corrosion and ensures hinges withstand daily use. Additionally, ensuring the wall substrate supports the dynamic load is crucial to avoid hinge failure. Regular inspections and maintenance, such as tightening screws and using non-abrasive cleaners, contribute to long-term performance.
Readers should take their time during installation. Rushing can lead to common mistakes, such as misaligned hinges or overtightening screws.
Feel free to share your experiences or ask questions in the comments below! Your insights can help others navigate their shower hinge installation journey.
FAQ
What type of shower hinge is best for my door?
The best shower hinge depends on the door type and weight. For frameless doors, glass-to-glass hinges work well. For framed doors, wall-mounted hinges are suitable. Always consider the door's weight and thickness when selecting hinges.
How do I know if my shower door is properly aligned?
Check for even gaps between the door and the frame. Use a level to ensure the door hangs straight. If the door drags or does not close properly, realignment may be necessary.
Can I install shower hinges myself?
Yes, many homeowners can install shower hinges with basic tools and skills. Following manufacturer instructions and the tips provided in this guide can lead to a successful installation. However, consulting a professional is advisable for complex setups.
How often should I check my shower hinges?
Inspect shower hinges every few months. Look for signs of wear, loose screws, or misalignment. Regular maintenance helps prevent issues and extends the lifespan of the hinges.
What should I do if my shower door squeaks?
Squeaky shower doors often need lubrication. Apply a silicone-based lubricant to the hinges. If squeaking persists, check for loose screws or corrosion, and address those issues accordingly.
Are there specific screws I should use for shower hinges?
Use stainless steel screws for shower hinges. They resist corrosion and provide durability in humid environments. Always follow the manufacturer's recommendations for screw type and size.
How can I prevent water leaks around my shower door?
Ensure proper alignment and sealing of the shower door. Use high-quality silicone sealant around the edges. Regularly inspect and maintain hinges to prevent gaps that could lead to leaks.