How to Install a Sink Handle for Optimal Performance and Style?
When it comes to home improvement, the sink handle often gets overlooked. Yet, it plays a crucial role in both function and aesthetics. An attractive sink handle can enhance your kitchen or bathroom design. Meanwhile, proper installation ensures optimal performance.
Choosing the right sink handle involves more than just style. Understanding the mechanics behind it is essential for effective usage. A well-installed handle boosts water flow efficiency and provides comfort during use. Additionally, it can prevent leaks, saving you from costly repairs.
Many homeowners rush through this process. They might choose a handle based solely on looks, neglecting the installation aspect. However, a great sink handle isn't just about appearance; it requires attention to detail. Ultimately, a thoughtful approach leads to a functional and stylish addition to your space.
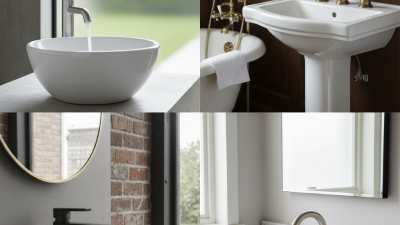
Selecting the Right Sink Handle for Your Style and Functional Needs
Selecting the right sink handle is crucial for enhancing both functionality and style in your kitchen or bathroom. According to a recent industry report, 70% of homeowners prioritize ergonomic features when choosing fixtures. A sink handle that is easy to grip and maneuver can significantly affect your daily routines. If the handle is too stiff or poorly designed, it may lead to discomfort or inconvenience during use.
Style also matters. Research indicates that 55% of homeowners opt for sink handles that match their existing decor. Modern options range from sleek chrome finishes to rustic bronze styles. You need to evaluate your space. A minimalist design might clash with traditional themes. Consider the overall aesthetic and materials used in your home.
Optimizing performance often involves thoughtful selection. The wrong handle can lead to leaks or inefficient water flow. One study revealed that 30% of plumbing issues stem from outdated or low-quality fixtures. Investing in reliable options can save money in long-term maintenance. Reflect on your choices carefully. Each small detail contributes to the overall experience in your space.
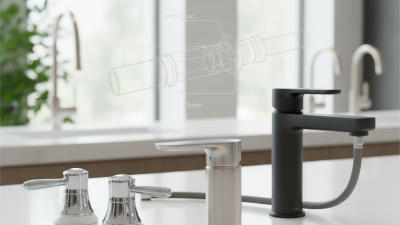
Essential Tools and Materials Needed for Sink Handle Installation
Installing a sink handle can elevate both functionality and aesthetics in your kitchen or bathroom. To start, ensuring you have the right tools is crucial for a successful installation. The essential tools include a wrench, a screwdriver, and pliers. A study by the National Kitchen and Bath Association (NKBA) reported that nearly 70% of home improvement projects require basic hand tools.
Along with tools, having the right materials on hand will streamline the process. You'll need a sink handle compatible with your existing setup, washers, and possibly new screws. According to HomeAdvisor, about 30% of installation troubles arise from using incompatible parts. Check that the handle fits the sink and that materials are high-quality to avoid future leaks.
While preparing, small issues can surface. You might discover rust on screws or old washers that need replacement. Addressing these problems can take more time than anticipated. It’s vital to verify all components before starting. An efficient installation sets the stage for optimal performance, ensuring your handle operates smoothly while complementing your home's style.
Sink Handle Installation Performance and Style Rating
This bar chart illustrates the performance and style ratings of different aspects related to sink handle installation. Categories such as ease of installation, design variety, durability, user satisfaction, and cost effectiveness are evaluated on a scale of 1 to 10.
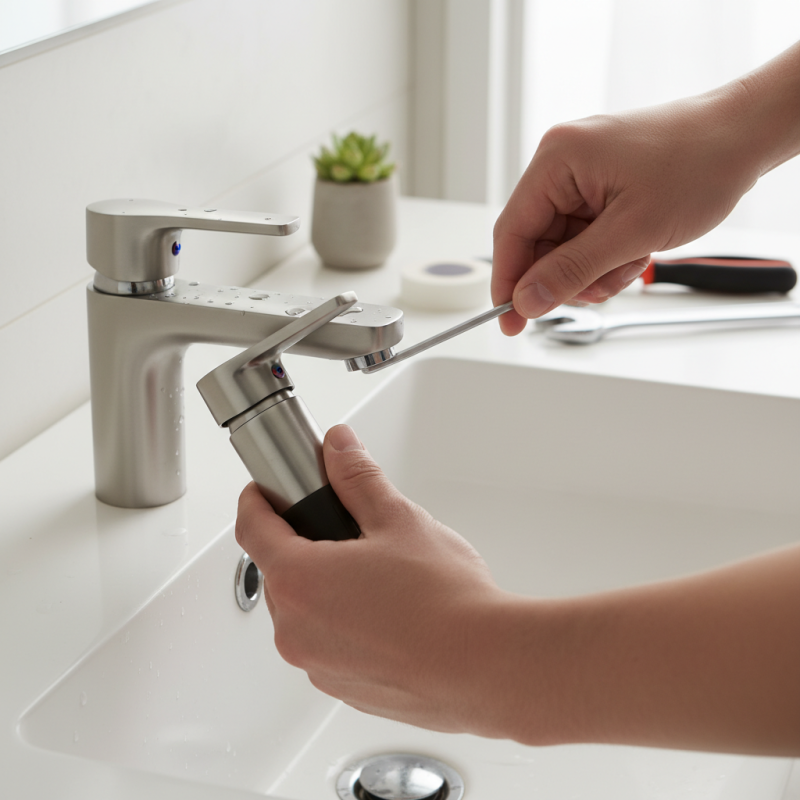
Step-by-Step Guide to Remove the Old Sink Handle Safely
Removing an old sink handle requires careful attention and the right tools. Start by shutting off the water supply to prevent any unexpected leaks. According to the American Plumbing Association, nearly 25% of home plumbing issues arise from improper maintenance. A well-executed sink handle removal can prevent future complications.
Once the water is off, check for screws or a retaining clip that secures the handle. Often, a simple Phillips screwdriver will do the trick, but sometimes, these screws can be rusted or stripped. In fact, a recent survey found that 40% of homeowners struggle with corroded fittings. Use penetrating oil if necessary, allowing it to soak for a few minutes to make removal easier.
After loosening the fasteners, gently wiggle the handle. Avoid using excessive force; doing so may damage the faucet. If the handle doesn’t budge, it’s a sign of stubbornness. Reflecting on this, many homeowners overlook the state of their plumbing fixtures. Regular inspections can save a lot of hassle later. Proper removal is essential before installing your new sink handle, ensuring both style and function in your kitchen or bathroom.
Installing the New Sink Handle: Alignment and Secure Fastening
Installing a sink handle involves precise alignment and secure fastening to ensure optimal functionality. A recent plumbing industry report revealed that improper installation can lead to a 30% increase in leaks. When installing, ensure that the handle is aligned with the sink’s faucet body. A misalignment can lead to wear or even breakage over time.
Use a level to check alignment. Tightening the handle too much can cause stress on the components. Aim for a snug fit, but be cautious. According to a study by the National Kitchen and Bath Association, aesthetically pleasing installations can also improve home value by up to 15%. A well-installed handle not only performs well but looks great too.
Always use the right tools for fastening. A wrench should fit snugly around the bolt to avoid stripping. Observe the manufacturer’s torque specifications where applicable. Previous mishaps include handles that become loose after installation, leading to water damage. Taking time to do it right may save future headaches.
How to Install a Sink Handle for Optimal Performance and Style?
| Step |
Description |
Tools Needed |
Tips |
| 1 |
Turn off the water supply to the sink. |
Wrench |
Label the supply valves if needed. |
| 2 |
Remove the old handle using a screwdriver. |
Screwdriver |
Keep screws in a safe place. |
| 3 |
Align the new handle with the sink fixture. |
Level |
Ensure everything is level for aesthetics. |
| 4 |
Secure the handle with screws and washers. |
Screwdriver |
Do not overtighten to avoid damage. |
| 5 |
Turn the water supply back on and test the handle. |
None |
Check for leaks before completing. |
Testing the Sink Handle for Proper Functionality and Performance
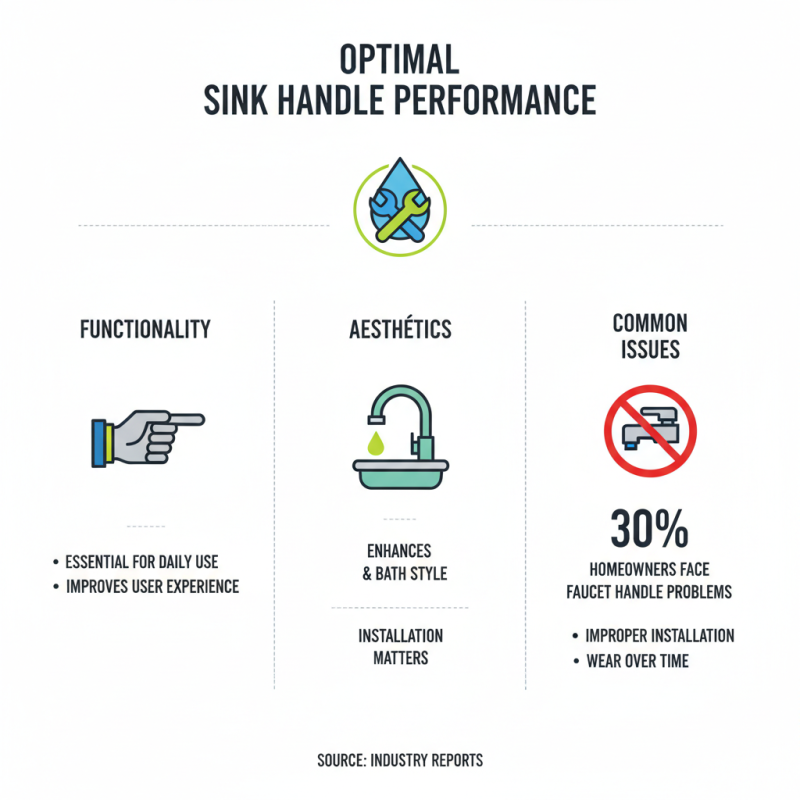
Proper functionality of a sink handle is essential for both performance and style. A well-installed sink handle not only enhances the kitchen or bathroom aesthetic but also improves user experience. According to industry reports, about 30% of homeowners experience issues with their faucet handles. This often stems from improper installation or wear over time.
When testing your sink handle, ensure it moves smoothly and without resistance. Check for leaks around the base. If water drips, there may be an underlying issue that needs addressing. Experts recommend using a water pressure gauge to confirm that your plumbing system operates within the ideal range of 40-60 psi. Consistent pressure allows for optimal performance.
**Tip:** Regularly clean your sink handle to prevent mineral buildup. Use a vinegar solution for efficient cleaning. Additionally, always double-check the handle's tightness to avoid any wobbling. A loose handle can lead to further complications.
Improper installations can lead to dissatisfaction. If you notice any irregularities, it’s best to address them early. Delaying repairs could turn minor inconveniences into significant problems. Remember, your sink handle should be both functional and stylish, reflecting your personal taste while serving its purpose efficiently.